

How To Send Digital Art Commissions
M. T. Dremer studied graphic design at Muskegon Community College and has been using Adobe Photoshop for more than a decade.
Graphic Design is one of my passions, but I didn't seriously consider applying for any jobs in the field until just recently. As I examined many of the openings I noticed that most, if not all, graphic design positions request that a portfolio be submitted along with a resume and/or cover letter. I've made art portfolios in the past, but up until this point, my idea of a portfolio has been one of two things; either it's a fancy leather case with physical sheets of paper inside of it (with the artwork on those sheets) or it is a website with links to uploaded works. There were a couple of problems I had with each of these methods. The first is that I'm a graphic designer, not a painter or an illustrator. I do most, if not all, of my artwork on the computer with Photoshop. I understand that an artist of any kind should be well rounded, and I took my fair share of traditional art classes in college, but that didn't mean I had any illustrated work that I wanted to put in a portfolio. For that reason, the leather case seemed silly as it would have consisted only of printed works from a computer. The second option; a website, while a great avenue for any artist looking to get into the field, didn't appeal to me. I design as a hobby, and the idea of paying for the upkeep of a website I might rarely, or never, use seemed silly. So when I observed the job postings I began to wonder what I could come up with as an alternative; something that would showcase my digital work and could be attached to an email. The following is what I came up with.
Disclaimer: All of the methods described in this article were thought up by me and aren't necessarily a representation of the standards for professional portfolios. The purpose of this article is to give another option to people who, like me, would like to showcase their artwork in a convenient, digital form.
Step 1: Compile Your Work
The first thing you want to do is gather every sliver of artwork you've created that you want to represent you. This could be anything from a sketch in a notebook to a movie poster you designed on your computer. Pick the things you are most proud of or that you think turned out as an impressive final product. It helps to make a list of these so you can keep track of which ones you have and haven't added to the portfolio yet. You could also make a folder on your computer dedicated to works that will eventually go into your portfolio. A folder would also help if you are scanning drawings/paintings into your computer.
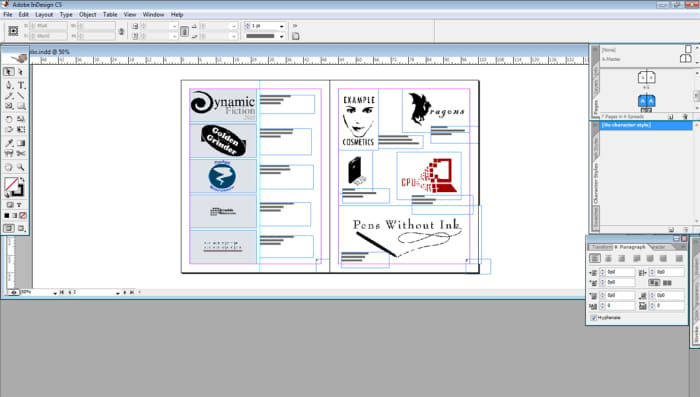
This is an example of what your portfolio will look like in page making programs. This one is Adobe InDesign and I'm showing two examples of how you could layout your page.
Step 2: Choose your portfolio type
For my portfolio I chose the PDF format. I did this because PDF has the capability to be multiple pages with text and picture at a decent file size. I did notice, however, that when saving a document as a PDF, the picture color doesn't always convert the way you want it to. For this reason, you may have to make adjustments to the original picture depending on whether or not you think the color changes are detrimental to your work. Also note that you will need the full version of Adobe Acrobat in order to make a PDF document. I believe there might be some free conversion tools floating around on the internet, but I haven't come across a reliable one, so I can't recommend any. Once Adobe Acrobat is installed on your computer, you can convert a number of different documents into the PDF format, including Microsoft word, Adobe InDesign (which is what I used), or QuarkXpress.
If you don't have Adobe Acrobat or any page design software, and you can't afford to purchase them (they are pretty expensive if you're not a college student) then another option available to you would be the zip folder. In this scenario, all of your images would be saved in an image format (jpeg would be best) and then zipped to a common folder that would serve as your portfolio. (If you made a folder for all of your images then you're already ahead of the game.)
Organize your images and give them a table of contents. The last thing you want to do is confuse the employer.
Step 3: Organizing your work
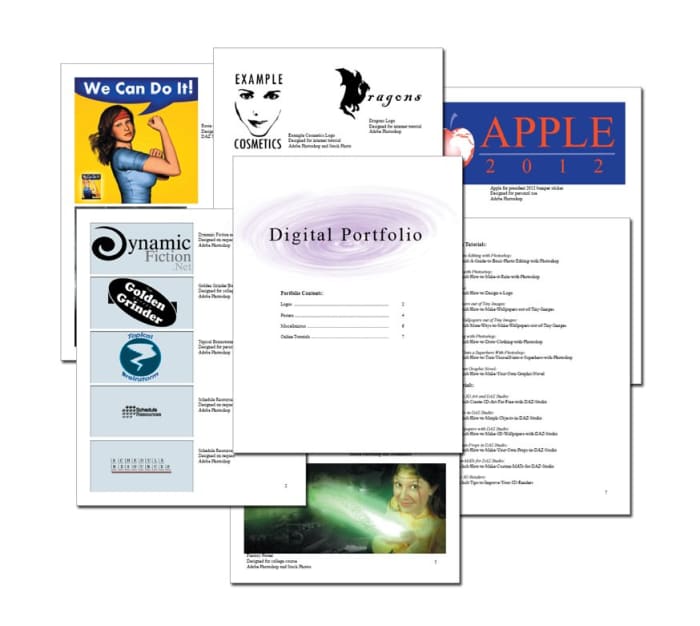
Once you have all of your work compiled, it's a good idea to organize it into some sense of order. For example, you could group all of your logos together or organize all your posters on the same page. The reason that you will want to do this is so that you can create a table of contents and any prospective employer can single out projects that are relevant to their specific company. For example, a company that deals only with making pamphlets might not care about that picture you drew of shaded eggs. That doesn't mean you can't include these things, it just means you should categorize it as a drawing so that the employer can find what they're looking for much easier.
If you're using Microsoft Word, Adobe InDesign or QuarkXpress, a table of contents is fairly easy. Include each category of art (logos, illustrations, posters, etc.) and the page number of where each one begins. If you're using the Zip folder method, try to include a text file with your pictures that identifies them. There won't be page numbers, by you can list each work included, as well as a brief description so the employer will know if they want to look at it or not. It might also be helpful to label your files in the following way: Logo1, Logo2, Illustration1, Illustration2. This is to ensure the least amount of confusion when viewing your portfolio.

This is an example of how you could label your pictures if you aren't using a page making program. Notice the white box in the lower right and the information it contains.
Step 4: Labeling your work
To keep things simple and concise, I use the following format for labeling images when I created my portfolio:
Title of piece
Reason for creating it
Materials used to create it
So, for example, I labeled one of my logos in the following manner:
Example Cosmetics Logo
Designed for internet tutorial
Adobe Photoshop
In three simple lines this tells the employer what the piece is, why you made it, and what you made it with. This information can be written next to the image or on the image (on the image might be the best option for a zip portfolio as long as it doesn't obscure the artwork). It is also a good idea to list any accolades any given image might have. For example, if you entered your piece into a competition and received an honorable mention, you should identify that on the image.
Step 5: Miscellaneous and Finalizing
Before you finish your portfolio, consider adding any other information that might be relevant. If you've had an art-related job or accolade that is unrelated to the artwork in the portfolio, then make a point to write those down as well. In my case, I provided the titles of, and links to, my graphic design tutorials here on HubPages. Not only does it display more of my graphic design work, it also demonstrates my knowledge of the field.
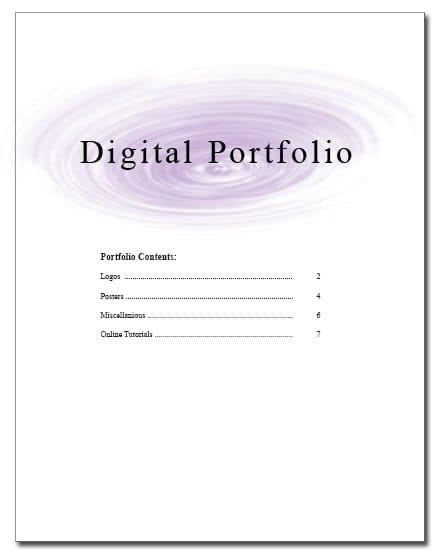
Once you have all the artwork, the table of contents, and miscellaneous items compiled together it's time to finalize it. If you created it in Microsoft word, you might be able to leave it in that format (though images tend to load slowly in word). If not, then convert it to a PDF using the file menu option. The same can be accomplished in InDesign by selecting "export" from the file menu. If you are using the zip folder method, simply right click on your portfolio folder and click on "send to" followed by "Compressed folder".
Throughout all of this, keep in mind file size. If the images you've included are enormous, then you won't be able to attach your portfolio to any emails (email providers usually have a size limit on attachments). If you find that yours is too big, try shrinking each individual image, or reducing the amount of images in the portfolio.
You're done! Congratulations, you have a digital art portfolio; one that doesn't require payment to upkeep and can be submitted digitally. Hopefully it will help get you on your way to a promising Graphic Design career.
Additional Tips
- If you have drawings/paintings that you want to include, but don't have a scanner, call your local library. Often times public computer labs will have a scanner available for use. Just remember to bring your flash drive.
- If you think your portfolio is lacking content, don't be afraid to create something new. Draw a new picture, or design a mock-up poster. It's quicker to use things you've already created, but a portfolio is all about showing off your artistic abilities, so don't be afraid to go that extra mile.
- When organizing your images in a page making program (like Adobe InDesign or QuarkXpress) always work towards clarity. Your format could be a clean list of pictures, or a wacky fun spiral pattern, but if the employer can't follow it, then it isn't serving its purpose. (See second image for some examples of layouts.)
This article is accurate and true to the best of the author's knowledge. Content is for informational or entertainment purposes only and does not substitute for personal counsel or professional advice in business, financial, legal, or technical matters.
mpofu njabulo on June 26, 2019:
a very informative guide to digital portfolios.
Lilly on July 30, 2018:
Thankyou so much for this - it was very thorough and extremely helpful
Joel Jay Arts on December 15, 2017:
This is really nice and it has helped me.. What a wonderful idea
sana on July 26, 2017:
A helpful information
M. T. Dremer (author) from United States on November 05, 2013:
Hugo Furst - Thank you for the compliment. When most applications take place online, I tried to figure out a way to make the portfolio digital and easy to read. It's a fun method to play around with.
Hugo Furst from Australia on November 04, 2013:
What an interesting method you have! Thanks for sharing it, pal :) Looking forward to reading more of your stuff. Voted up!
M. T. Dremer (author) from United States on March 13, 2013:
Vector design - Thank you for the compliment and the comment!
Saim from California on March 12, 2013:
Very informative Hub. I really like your idea. You discuss some good points in this hub.thanks for sharing.
M. T. Dremer (author) from United States on May 04, 2012:
Randy M. - You're welcome! It's very handy to have a portfolio that can be shot off in an email. Good luck, and thanks for the comment!
Randy McLaughlin from Liberia, Costa Rica on May 03, 2012:
I am now motivated to make my own digital art portfolio. Thanks!
asigurare from Bucharest, Romania on August 17, 2011:
Thank you for this article. Now I want to use what I have learned and to make my own digital portfolio.
M. T. Dremer (author) from United States on June 22, 2011:
paul - You're welcome. When I first wanted to create a digital portfolio I had no idea which direction to go in, so I'm glad that I could help!
paul on June 22, 2011:
Thank you for this, its good to have some pointers.
M. T. Dremer (author) from United States on April 05, 2011:
maria.rose - Thank you for the compliment! When I first started researching how to make a digital art portfolio, none of the methods really matched up with what I wanted to do. So I'm very glad I conveyed my methods clearly. Thank you for commenting!
maria.rose from Florida on April 04, 2011:
Excellent, clear. And accurate information. You release the information at a very good rhythm and speed and are perfectly understandable .thanks a lot for sharing this.
How To Send Digital Art Commissions
Source: https://toughnickel.com/finding-job/How-to-Create-a-Digital-Art-Portfolio
Posted by: chalfantretticuld.blogspot.com
0 Response to "How To Send Digital Art Commissions"
Post a Comment